Preparing for a Live Set
Kombiner’s track table, audio player, filters, and playlist tools are built with gig prep in mind. This guide walks through a complete pre-gig workflow — from creating a set playlist to verifying every track has a local file and is ready to export.
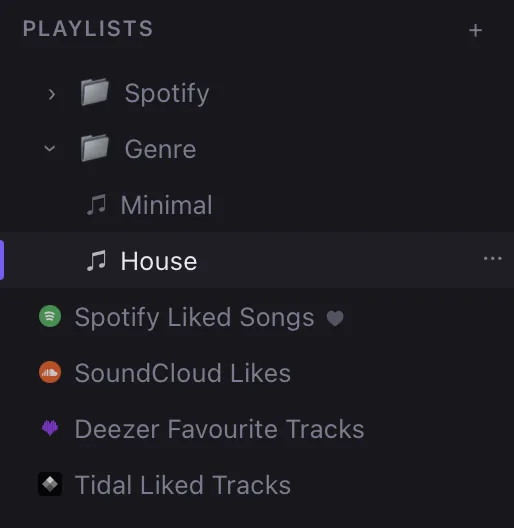
Step 1 — Create a Playlist for the Set
Start by creating a dedicated playlist for the upcoming gig:
- In the Playlists sidebar, right-click the folder you want to use (or the root) and choose New Playlist.
- Name it something meaningful — the venue name, date, and genre work well (e.g.
2026-07-04 Fabric — Techno). - The playlist appears in the sidebar. Click it to open the playlist view.
Playlists support nested folders, so you can keep a top-level Gigs folder containing one playlist per event. Drag playlists between folders to reorganize at any time.
Step 2 — Filter the Library to Find Suitable Tracks
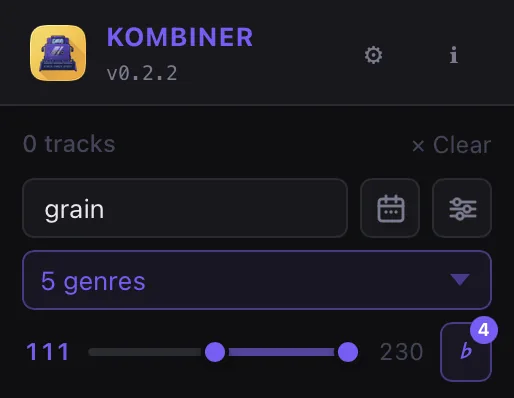
Switch to the Library view. Use the filter toolbar to narrow down tracks to candidates that fit your set:
- BPM range: Set a minimum and maximum BPM. For a 130–140 techno set, type
130and140in the BPM filter inputs. Kombiner shows only tracks within that range. - Key: Filter by one or more musical keys to find harmonically compatible tracks. If you mix using the Camelot Wheel, you can filter by adjacent keys (e.g. show
8A,8B,9A) to build a harmonically coherent set. - Genre: Select one or more genres from the genre filter dropdown.
- Format: Use the format filter to show only tracks you own as files (select any format — MP3, FLAC, WAV, etc. — to exclude metadata-only tracks that haven’t been acquired yet).
Combine multiple filters freely — Kombiner applies them all simultaneously. The track count in the toolbar updates in real time as you adjust filters.
Tip: Save a search/filter combination by bookmarking the filtered view, so you can return to it without reconfiguring the filters each time.
Step 3 — Add Tracks to the Playlist
With the filtered results visible, add tracks to your set playlist:
- Context menu: Right-click selected rows, choose Add to Playlist, and select your target playlist from the submenu.
Within the playlist view itself, you can reorder tracks by dragging rows up or down to arrange the set order. There’s no right or wrong order at this stage — think of it as a rough ordering that you’ll refine during previewing.
Step 4 — Preview Tracks with the Audio Player
Kombiner’s built-in audio player supports MP3, FLAC, WAV, AIFF, AAC, and OGG playback directly from disk. Use it to audition candidates before committing them to your set.
Hover Preview
Hover over any track row in the library or playlist to start an automatic preview. By default, preview starts at 1:00 (one minute into the track), which is typically past the intro and into the main groove — the most useful part for evaluating whether a track fits your set.
The hover preview plays through until you move the mouse to another track. This allows rapid audition of many tracks.
Full Playback
Click the play button on a track (or click anywhere in the waveform area if visible) to begin full playback from the start. The player controls appear at the top of the screen.
Keyboard Shortcuts
While the audio player is active, you can control playback entirely from the keyboard:
| Key | Action |
|---|---|
Space | Play / Pause |
← (Left arrow) | Seek backwards 10 seconds |
→ (Right arrow) | Seek forwards 10 seconds |
↑ (Up arrow) | Previous track |
↓ (Down arrow) | Next track |
These shortcuts work whether you’re in the library view, a playlist, or the Favorites view — making it fast to step through a list of candidates without taking your hands off the keyboard.

Step 5 — Scrub with the Jog Wheel
For fine-grained scrubbing within a track — checking a specific breakdown, verifying a transition point, or finding a usable loop start — use the horizontal scroll jog wheel.
Place your cursor over the playback position area in the player bar and scroll horizontally (two-finger swipe on a trackpad, or horizontal scroll on a mouse wheel). The playhead moves in the direction you scroll, giving you hands-on tactile control of the playback position — similar to physically spinning a jog wheel on a CDJ.
This is especially useful when checking:
- Whether a track’s outro is clean enough for a transition
- Where the first kick hit lands (for beatmatching reference)
- Whether a vocal or breakdown is where you expect it
Step 6 — Verify All Tracks Have Files
Before finalizing your set, confirm that every track in your playlist has a local audio file.
In the playlist view:
- Check the Format column. Tracks with a local file show the file format (FLAC, MP3, etc.). Tracks without a file show a dash or a “No file” indicator.
- Alternatively, switch to the Library view, activate the No File filter, and then filter by your playlist name — this shows any playlist tracks that still need to be acquired.
For any missing tracks:
- Add them to the Acquire cart (right-click → Acquire).
- Select sources to buy and complete the acquisition process.
- Return to the playlist and confirm the Format column now shows a valid format for all rows.
Tip: Make this file-check step a routine part of your gig prep — ideally at least 48 hours before the event, so you have time to acquire any missing tracks without rushing.
Step 7 — Export to DJ Software
Once your playlist is finalized and all files are acquired, export it — right-click the playlist and select Export, then in your DJ software’s library, import the exported playlist.
Summary Checklist
Use this as a pre-gig checklist:
- Set playlist created and named
- Tracks filtered by BPM, key, and genre
- All candidate tracks previewed and auditioned
- Set order rough-arranged by drag-and-drop
- All tracks have local files (No File filter clear)
- Missing files acquired from Beatport/Bandcamp
- Library exported to DJ software (when export plugins are available)